Here's a video that shows how waypoints can be added and changed during flight using uThere's Ground Control software and transceiver: [Watch Video]
Launch the uThere Ground Control application
If you're at the field with a live plane, press "Connect". [more info...]
If you're preparing a mission to be loaded into Ruby at a later time, press "Configure".
Select menu item "View: Map"
Center the Map display on the area where you'd like to fly waypoints. [more info...]
Draw waypoints
Create:
Right-click on on the position map where you'd like to create your first waypoint, then select "Add Waypoint". (Keyboard shortcut Alt -W).
Move:
You can drag the waypoints around after you create them.
You can even drag an active waypoint around as the plane is flying towards it.
Delete:
Delete a waypoint by clicking on it and right-click: Delete Waypoint (or just delete key on keyboard)
Insert:
Click on the existing waypoint which is to come before the one you'd like to create. Move cursor where you want the new waypoint and select "Add Waypoint".
Editing waypoint properties
You can change the altitude, airspeed, turn radius, and other waypoint properties clicking on a waypoint to select it, then right-clicking on the display and selecting Properties... [more info]
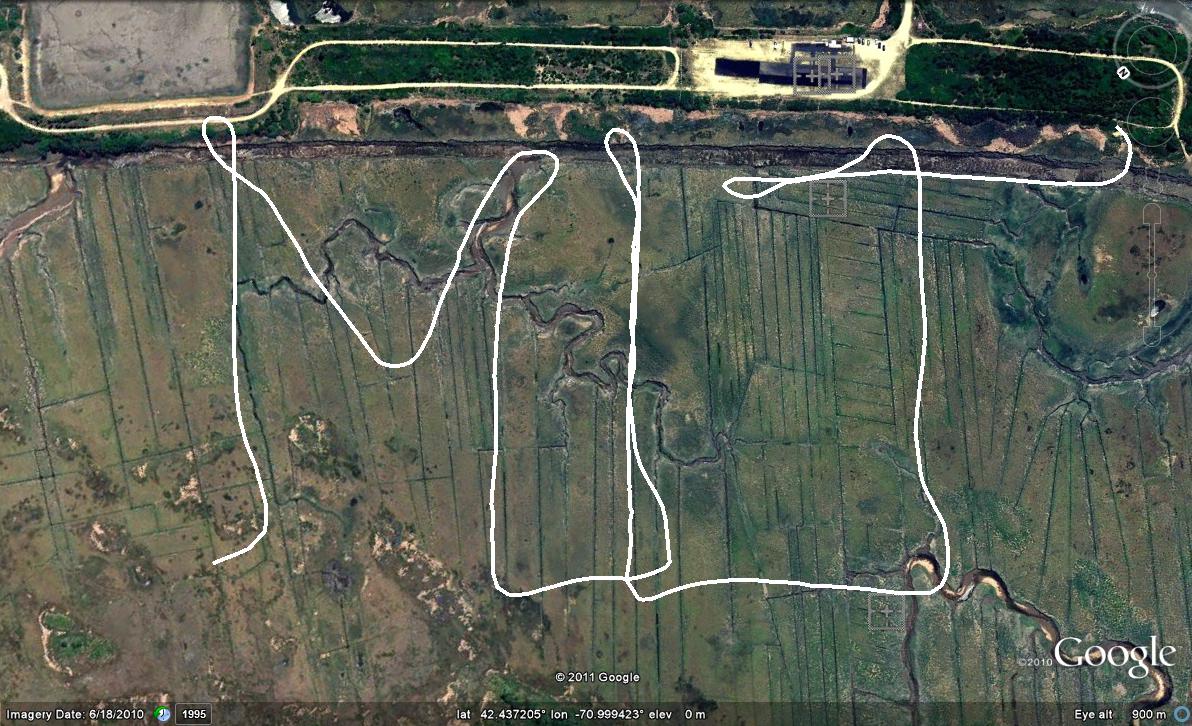
Creating scan / search patterns
GC can automatically create patterns of waypoints useful for creating photomosaics or conducting searches of an area. [more info...]
Saving waypoints
Select File: Waypoints: Save...
To create a file that can be stored to Ruby's SDFlash chip,, save as a ".utwpb" file.
To create a file that can be edited with a text editor or read by Ground Control, save as an ".xml".
Note: it's not necessary to save waypoints if you just want to transmit them to Ruby immediately using the transceiver.
Executing Waypoints
Transmitting waypoints to Ruby using the transceiver
Ground Control must first be connected to the plane via transceiver. [more info]
Right-click in the Position display and select "Fly to First Waypoint" or "Fly to Selected Waypoint"
-or-
Press the "Waypoint mode" button on gamepad or joystick.
-or-
Select "Waypoint mode" at the top right of the Ground Control screen
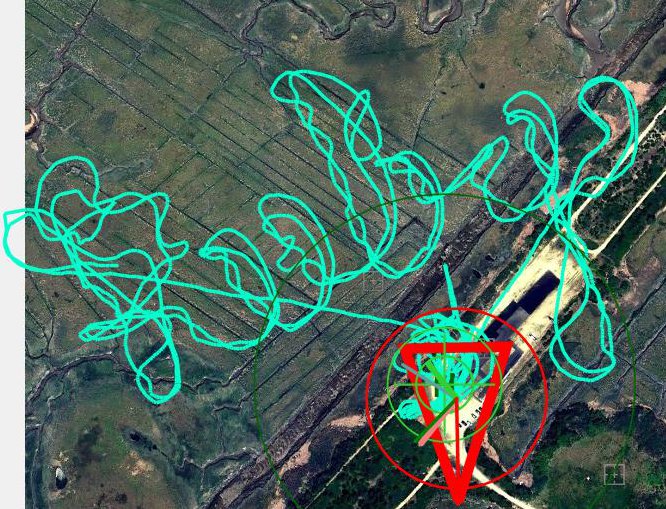
The green target circle and cross will appear on the waypoint and the light green line coming from the center of the plane icon (desired course) will point towards it.
You can enter waypoint mode this way during flight or just prior to launch. If you do it prior to launch, Ruby will climb in a straight line until it reaches minimum altitude (default 75 feet AGL) before turning towards the first waypoint.
Note that as you drag the current target waypoint, the update will be transmitted immediately, with the plane changing course steadily to follow the waypoint as it is moved.
Executing a ".utwpb" waypoint file that was stored on the SDFlash chip (handheld R/C transmtter only)
A set of waypoints can simply be loaded into Ruby's SDFlash chip and executed using a traditional handheld R/C transmitter without Ground Control or transceiver.
** This is only possible when used with a conventional R/C handheld transmitter, with Ground Control not assuming control via transceiver.
Instructions:
During flight or prior to launch, simply flip the mode switch to the middle position for "Waypoint / PC control". If a valid waypoint ".utwpb" file is present in the "ruby" directory, Ruby will fly to waypoint #1 and from there to any following waypoints.
Be sure to have the throttle stick all the way forward so that Ruby will be allowed to apply as much throttle as needed to maintain altitude.
Flipping the mode switch to a different position will immediately abort waypoint following. Moving the mode switch back to the far position will always restart waypoint following at waypoint #1.
Behavior
When Ruby comes to a waypoint without any following waypoint, or a waypoint that is beyond range limit (see below) it will return to home.
If signal is lost, Ruby will continue following waypoints for a few seconds before returning to home. This way, momentary losses of signal do not cause missions to be aborted.
You can temporarily override waypoint directional control by moving the aileron stick.
Range limit
By default, Ruby autonomous waypoint range is limited to 1 km range from home or launch location. If you would like this limitation removed, contact support@uthere.com with coordinates of suitable unpopulated areas in which you'd like to fly. We'll be glad to provide you with a firmware update which will allow unrestricted autonomous flights in those areas. There's no additional cost.
You alone assume full responsibility for the safety and legality of your flights.