Specifications
| Range |
Using low gain dipole "stick" antenna: 2 -3 miles / 3 - 5 km typical.
Using high gain ground antenna: more than 8 miles / 13 km
|
| RF Output |
750mW / +27 dBm |
| Sensitivity |
-104 dBm |
| Bandwidth |
40Kbps to 1Mbps |
| Frequency |
915 mhz. DSSS Spread spektrum |
| Power consumption |
Transmit: 450 ma max
Receive: 30 ma
5 volt input |
| FCC/IC Approved |
|
| Multiple aircraft |
There are ten separate radio channels available that may be assigned / selected via the Ground Control software.
It's also possible to have multiple transceivers operating in a given channel.
Contact sales@uthere.com for details. |
Airborne transceiver
Installation
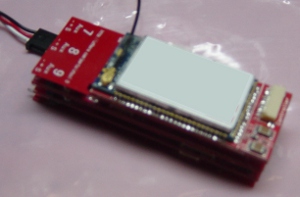
This module measures just 3 x 1 x 0.2 inch and may be stacked directly onto the Ruby Expander or Controller using the 60 pin connector with no cables, or it can be located remotely using a ribbon cable plugged into the Ruby controller "modem" port and a separete servo style lead to provide +5 volts.
Plugging directly into the expander/controller
*** IMPORTANT: the module must be oriented correctly as shown in this picture, with one end flush with the end of the Ruby controller or expander. The antenna wire will be closest to the end of Ruby with servo pins.
Ruby and/or the module will be permanently damaged if power is applied with it plugged in the reversed direction. In the preliminary version of the hardware, there is no keying to physically prevent this from happening. |
 click to enlarge click to enlarge
|
Don't plug anything into the "modem" port, even if you have the transceiver stacked on the expander and the modem port is open.
If you have a transceiver connected to Ruby, you can only use one satellite receiver, and it must be plugged into the "serial 2" port on the expander.
Ground Transceiver
Connection to PC
The Ground Transceiver connects to any laptop / PC via standard USB cable.
Installation
When you first plug in the transceiver, you will be asked to find a driver. The latest driver can be downloaded here.
Operation
Download and launch the Ground Control application.
Power up your Ruby with the airborne transceiver connected.
File: Configuration: Select: Default
(You only have to do this the first time you run Ground Control. This selection will be remembered when you launch Ground Control again in the future.)
File : Connect
Look at the bottom left of the screen for connection status. After a few moments, you should see: "Live Source: Receiving and recording data". At the bottom right, you should see the time rapidly incrementing - it does so every time a packet of data is received. The instruments and other telemetry displays should come alive.
Controlling Ruby
Besides simply watching telemetry, you can use off the shelf video game / flight simulator joysticks and throttle controls to fly your aircraft.
You should only fly in this mode in conjunction with someone who with a conventional remote control transmitter who will maintain visual contact with the plane at all times. That operator will be able to override control by the laptop operator if necessary.
[More information about controlling a Ruby aircraft via the PC]
|

