Contents:
WARNING:
STAY CLEAR OF PROPELLER - COULD START UNPREDICTABLY
Flight control
| Arm throttle + Waypoint / RTH mode + Launch |
"Start" button (small button to the right of logo)
(*** DANGER! Will immediately go to full throttle as Ruby attempts to climb to waypoint / default altitude. This is your 'LAUNCH' button.)
Throttle will not be allowed if receiving signal from handheld with throttle stick in "off" position.
(*** Currently won't enable throttle on the ground without valid signal from handheld with throttle stick all the way forward unless Ruby configuration ap_throttle_autonomous_minimum_altitude_agl is set below 0.) |
| Disarm throttle |
"Back" button (small button to left of logo)
** After landing, and whenever in doubt, always remember to disarm throttle. |
| Set Home |
Hold down "back" button while pressing "B" |
| Preflight |
Hold down "back" button while pressing "X" |
Aided mode /
Lock altitude and heading |
"A"
Camera will be pointed in direction of flight path. [more info...] |
Waypoint mode /
Loiter at current position |
"Y"
If one or more waypoints exist, will fly to first waypoint.
If no waypoint has been created, will loiter at current position.
Camera will be pointed at location on ground beneath waypoint [more info...]. |
| Return to home and loiter |
"X"
Camera will be pointed at home. |
| Return to home and land |
"B"
Camera will be pointed at home. |
| Turn |
Hold right joystick to the left or right to control or temporarily override direction.
Heading hold or autonomous heading will be enaged whenever the right stick is returned to center or "A" is pressed. |
| Heading |
POV left and right change target heading in 10 degree increments.
(Aided mode only) |
Loiter Radius
|
POV right = increase loiter radius
POV left = decrease loiter radius
increment: 25 feet
(waypoint and loiter mode only. No effect on return to home loiter.) |
| Airspeed continuous |
The right and left triggers control target airspeed proportionaly to deflection of the trigger.
Maximum airspeed: Press right trigger fully.
Minimum airspeed: Press left trigger fully.
Default cruise airspeed: Release both triggers.
Hold airspeed: Press the button above either trigger as the trigger is held at desired target airspeed. This target airspeed will be held after both triggers are released. Momentarily pressing either trigger or pressing both buttons simultaneously will revert back to default cruise airspeed. |
| Airspeed incremental |
Increment airspeed: Press the button above the right trigger. ("RB")
Decrement airspeed: Press the button above the left trigger. ("LB")
Increment steps approximately 2.5 knots. |
| Climb rate |
Continuous control:
Increase climb rate: Deflect the right stick forward / away from you.
Decrease climb rate: Deflect right stick down/ towards you
Hold climb rate: Press the joystick like a button, move stick to desired position and release. |
| Altitude hold |
If you have not engaged climb rate hold, altitude hold will be engaged at current altitude whenever the right joystick is returned to center.
If you have engaged climb rate hold, clicking on the right joystick button while the joystick is centered, or deflecting the stick momentarily from center and allowing it to return to center will disengage climb rate hold and engage altitude hold.
Also remember that in Aided mode, pressing "A" will engage altitude hold.
** Note: Below minimum altitude (typically 75- 100 feet AGL), altitude hold will not engage. (This is to avoid complications when landing in aided mode.) With the stick centered, the target climb rate will be zero however, so except for some altitude drift, centered stick will still act somewhat like altitude hold.
(works only in aided mode) |
| Altitude increment |
POV up and down buttons change target altitude in 25 foot increments, starting with current altitude.
(Works only in aided and waypoint mode)
(Todo: Enable in loiter at current position and RTH modes) |
| Throttle |
* There is no direct control of throttle. Instead, you control target climb rate and airspeed. Both of these allow you to indirectly control the throttle. Ruby will dynamically modulate the throttle to maintain desired climb rate and airspeed as you maneuver and encounter turbulence. |
Launching
Perform "set home" or "preflight"
Put plane on launching apparatus or give to the person who will be hand launching.
Make sure that the launcher crew and everyone at the site knows that the propeller can quickly spin to full throttle at any time.
Yell "Ready for launch?". Wait for affirmative from launch crew.
If handheld transmitter is being used, move its mode switch to select PC/Waypoint mode and move its the throttle stick to the full "on" position. (As long as Ruby is receiving signal from the handheld transmitter, its throttle stick will set upper limit on throttle available to Ruby / PC operator and the handheld operator can grab control back from the PC by moving the mode switch..)
Use gamepad or PC interface to select desired mode to use during launch. You can launch in aided, return to home, or waypoint mode. In waypoint mode, you can have waypoints already placed on the position display prior to launch for true "one button" operation.
If you decide to launch in aided mode, hold the right joystick all the way forward for maximum climb = full throttle. Do this even if the motor seems to be running at full throttle. This will tell Ruby to climb rather than try to maintain current altitude. You might want to click on the right throttle stick as it is held forward to hold that throttle position so you can take your hands off of it.
In other modes, Ruby automatically applies full throttle to climb to target altitude.
Look at plane and launching area to be sure it is ok to launch.
Yell "Clear prop!"
Press the "Start" button.
Motor may spin up slowly. Launcher should not release until motor is steady at maximum RPM.
Landing in aided mode
Note: Normally, you will use "autonomous landing" to let Ruby take care of everything.
If you wish to land in aided mode for some reason, you will typically deflect the right joystick down and click the button to hold a descent, then steer the plane to line up with runway, and then move the joystick to make course and glideslope corrections.
For best aided landing, go out on a long shallow final approach and move the joystick to find the sink rate that will put you on landing target, then click on the joystick to hold that sink rate. The approach should be so shallow that some throttle is required to maintain the sink rate / glideslope, so Ruby has the option to drop back down to glideslope by reducing throttle.
Then as you get within a few feet of ground, nudge the elevator slightly to unhold that sink rate. With stick at center position, Ruby will apply throttle as needed maintain 0 fps climb. Gently push the stick slightly forward to tell it to settle to ground at a gentle slow sink rate. For slowest, softest possible landing in calm conditions, slow down the plane (left trigger) just before touchdown.
After landing *remember to press 'Back' to disable the motor*.
Camera tracking control
(See also: [camera tracking] for more info.)
The camera pan / tilt / retract, target, and camera tracking mode is controlled by the left joystick.
Changing flight mode can also change camera tracking mode (see above).
Deploy
(if retractable) |
Click left joystick button.
* Will not deploy if plane is below 30 ft AGL. |
| Force deploy |
Click left joystick button as joystick is held at extreme bottom position.
This will force the camera to deploy even if plane is below 35 ft AGL. |
| Slew pan / tilt |
Deflect joystick from center. |
| Fix location |
Click left joystick button.
This will cause the camera to stay fixed on the location at center of screen. |
| Un-fix location |
Hold down on left joystick button as you move the joystick from center.
This will set camera tracking to "relative to horizon" mode with azimuth and elevation fixed relative to earth. It will no longer stay fixed on a location. The camera field of view will move with the plane but will still not change as plane heading and pitch change. |
| Point camera in direction of flight path |
Press the "aided mode" button.
This camera tracking mode is only available in aided flight control mode. |
| Point camera in direction of current target waypoint. |
Press the "waypoint" button. |
| Point camera at home |
Press the "return to home" or "auto-land" button. |
| Fly to location |
Hold down left joystick button for 1 second.
Ruby will fly towards the location at center of screen while maintaining current altitude. |
Set landing location
(*NOT YET IMPLEMENTED) |
Hold down left joystick as you press the "auto-land" button.
Ruby will set the location at center of screen as landing target and enter auto-land mode. Landing direction will be the current bearing between plane and that target. |
Troubleshooting:
Ground Control automatically connects to any device with the word "game" or "XBOX" in its system name, as it appears in the "Game Controllers" control panel display. I.e. "PS3/USB Cordless Gamepad"
If GC does respond to gamepad controls, send to support@uthere.com the log file that was generated at :
C:\Users\{your user name}\Documents\Uthere\Ground Control\Logs
Notes:
Pushing the control stick all the way forward tells Ruby to seek maximum climb rate. For typical planes, this is about +30 feet per second.
Pushing the control stick all the way forward gives Ruby a target sink rate of typically -30 fps, but unless your plane has flaps or spoilers, the only control Ruby has over sink rate is throttle, so the actual sink rate at cruise airspeed will typically be only between -5 and -15 fps (and it can be > 0 fps if you hit a thermal). The only way to make the plane sink any faster / dive any steeper than throttle off glideslope is to increase drag by increasing airspeed and/or going into a steep bank.
Compatible Gamepads
The following have been tested with Ground Control:
| Ipega PG-9017 |
 |
Wireless Bluetooth
Connects directly to laptop / tablet / pc -or-
can mount to smartphone [pending development].
[setup and operation...] |
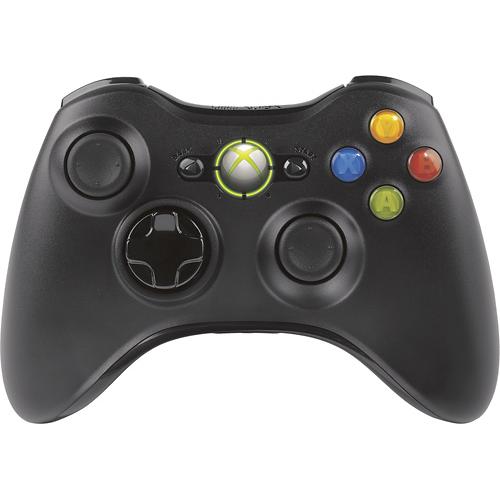
| Microsoft X-Box 360 |
|
Wired USB and Wireless
For use with laptop/PC, this requres a wireless adapter which is sold separately. |
| Radio Shack (Model 2603666) |
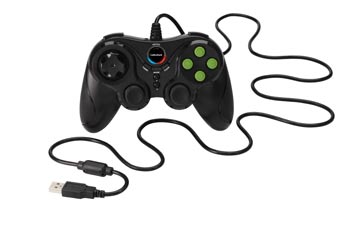
|
Wired USB
Notes:
"Y" = the "1" button
"B" = "2"
"A" = "3"
"X" = "4"
"Back" = "10"
"Start" = "9"
*** Do not press the "Macro" or "Turbo" buttons.
*** For correct operation of camera joystick and POV pad, press the "mode" button until a red light shines in the ring around the "Macro" button. |
| |
|
|
|